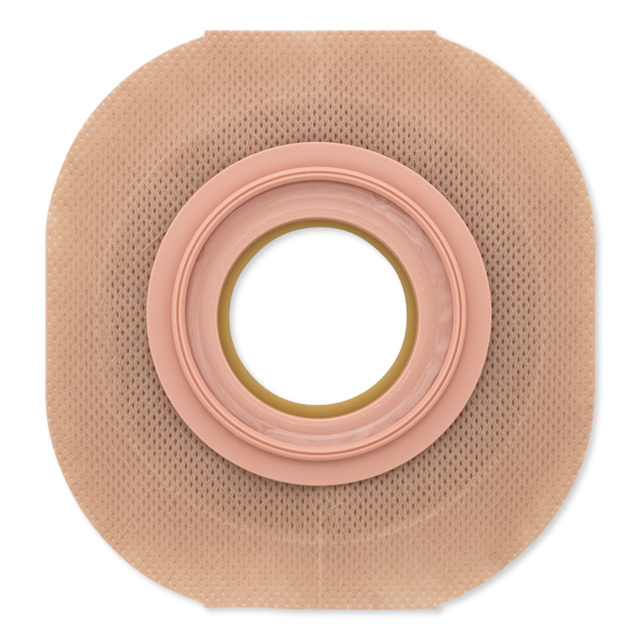
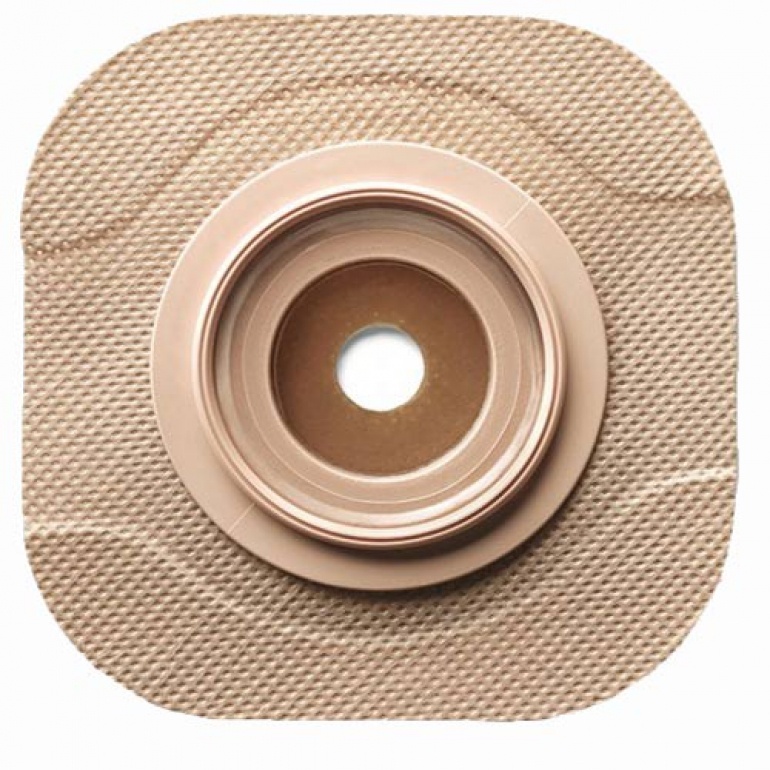
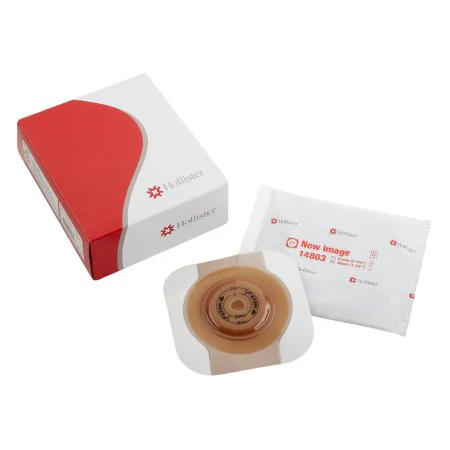
Slideshow Items

  • Ostomy Supplies
  • continence-ostomy/ostomy-supplies
  • Continence & Ostomy
  • continence-ostomy
HOL- Hollister

  |  

Hollister New Image Flextend Convex Barrier 1-3/4" Cut-To-Fit 1"

C$22.60
In stock online
In store: Check availability

Available in store

SKU: 14802

This convex barrier features Flextend extended-wear hydrocolloid resisting erosion for reliable sealing. The 45mm (1¾") coupling fits New Image pouches, while cut-to-fit opening up to 25mm (1") allows customization.

    • Why Convex with Extended-Wear Matters

      Retracted or flush stomas present unique challenges: without adequate protrusion, output can pool around the stoma base and seep under the barrier, causing leaks and skin irritation. Convex barriers solve this by applying gentle, even pressure that encourages the stoma to protrude into the barrier opening, creating better drainage angles and more reliable sealing. When you combine convexity with Flextend extended-wear hydrocolloid—formulated to resist the erosive effects of output better than standard adhesives—you get barriers that maintain their seal longer even on challenging abdomens. The 45mm compact coupling provides the smallest, most discreet profile in the New Image system while still delivering the convex support you need. This combination means fewer barrier changes, better skin protection, and more confidence in your seal.

      Perfect for: Ostomy users with retracted or flush stomas, soft or uneven abdomens, need for extended wear time (5-7 days), desire for smallest coupling profile, or recommendation from ostomy nurse for convex support.

      Key Features

      Convex profile — gentle pressure encourages retracted or flush stomas to protrude for better drainage
      Flextend extended-wear hydrocolloid — resists erosion and maintains adhesion longer than standard adhesives
      Cut-to-fit opening up to 25mm (1") — customize at point of care for precise stoma fit
      45mm (1¾") coupling — smallest New Image flange for most discreet profile
      Universal pouch compatibility — works with all New Image 45mm pouches (drainable, closed, urostomy)
      Low-profile design — comfortable wear without excessive bulk
      Durable adhesion — extended wear time of 5-7 days for most users
      Suitable for challenging anatomy — works on soft abdomens, uneven planes, areas with creases
      Two-piece convenience — change pouches multiple times per barrier cycle
      ✓ Latex-free; individually packaged sterile

      What You'll Appreciate

      Better stoma protrusion — The convex curve applies gentle, even pressure around your stoma, encouraging it to protrude into the barrier opening. This creates better drainage angles so output flows into the pouch rather than pooling at the stoma base.

      Extended wear time — Flextend hydrocolloid is specifically formulated to resist breakdown from exposure to output. Most users achieve 5-7 days wear time, compared to 3-4 days with standard adhesives. Longer wear means fewer changes and healthier skin.

      Erosion resistance — Output—especially ileostomy output—can be corrosive to barrier adhesives. Flextend's advanced formulation maintains its integrity even with continuous exposure, preventing the erosion that causes premature barrier failure.

      Custom fit — The cut-to-fit opening lets you trim to your exact stoma size (anywhere from very small up to 25mm/1"). Precise fit is crucial with convex barriers—too large and the convex pressure isn't effective; too small and it causes pressure on the stoma.

      Smallest profile — At 45mm, this is the most compact New Image coupling available. Combined with the low-profile convex design, it provides the support you need without excessive bulk under clothing.

      Fewer changes — Extended wear time means fewer barrier removals, which means less adhesive trauma to your peristomal skin. This is especially important for convex barriers where you're already managing challenging skin conditions.

      Two-piece flexibility — Change pouches 2-4 times during the barrier's wear cycle without disturbing the convex seal or removing adhesive from your skin.

      Reliable on soft abdomens — If you have soft abdominal tissue where stomas tend to retract, the convex support helps maintain protrusion even as tissue softness changes throughout the day.

      How to Use

      Preparation:

      1. Gather supplies:
        • New convex barrier package
        • Scissors (curved ostomy scissors work best)
        • Stoma measuring guide
        • Marker or pen
        • Adhesive remover (for previous barrier removal)
        • Clean water and towels
      2. Remove previous barrier:
        • Use adhesive remover to gently remove old barrier
        • Support skin while peeling
        • Remove all residue
      3. Clean and assess:
        • Wash peristomal area with water
        • Pat dry completely (critical for adhesion)
        • Assess skin condition
        • Check stoma appearance

      Measuring and Cutting:

      1. Measure your stoma:
        • Use measuring guide to determine stoma size
        • Measure at widest points (horizontal and vertical)
        • Stomas can change size, especially in first months—measure each time initially
      2. Determine opening size:
        • General rule: Cut opening 1-2mm (1/16") larger than stoma
        • Allows slight size variation without pressure
        • With convex, precise sizing is more critical than with flat
      3. Mark the barrier:
        • Place barrier adhesive-side up
        • Use measuring guide to mark cutting circle
        • Double-check measurement before cutting
        • Mark clearly so you can see cutting line
      4. Cut the opening:
        • Use sharp, clean scissors
        • Cut in one smooth motion if possible
        • Round cuts are better than jagged
        • Don't make opening too large—undermines convex effectiveness
        • Cut conservatively—you can always trim more, but can't make it smaller

      Application:

      1. Warm the barrier:
        • Hold barrier between hands for 30-60 seconds
        • Body heat activates adhesive
        • Makes barrier more pliable and adhesive more tacky
        • Especially important in cool environments
      2. Remove backing paper:
        • Peel off protective paper carefully
        • Don't touch adhesive surface
        • Some barriers have tabbed backing for easier removal
      3. Position yourself:
        • Stand in front of mirror if helpful
        • Some users prefer sitting, especially if stoma is low
        • Find position that gives you best view and access
      4. Center the convex curve over stoma:
        • This is critical: The convex curve must be centered on your stoma
        • Off-center application reduces convex effectiveness
        • Take your time with positioning—this is the most important step
        • The stoma should sit in the center of the cut opening
      5. Apply to skin:
        • Start by placing center over stoma
        • Press firmly in center first
        • Smooth outward from center in all directions
        • Use firm, even pressure across entire adhesive surface
        • Work methodically around the circumference
      6. Ensure complete adhesion:
        • Press firmly for 30-60 seconds
        • Pay extra attention to edges
        • Run your hand over entire surface
        • No raised areas or gaps
        • The convex curve should sit flush against your abdomen contour
      7. Hold and warm:
        • Hold gentle pressure for 1-2 minutes if possible
        • Your body heat helps activate full adhesive bond
        • This step significantly improves initial adhesion

      Attaching the Pouch:

      1. Select your pouch — drainable, closed, or urostomy (must be 45mm New Image)
      2. Align pouch coupling with barrier's 45mm coupling
      3. Snap into place — press firmly around entire circumference
      4. Listen for clicks — confirms secure connection
      5. Verify attachment — tug gently to ensure pouch won't detach

      Important Application Tips:

      Centering is critical:

      • With convex barriers, proper centering is more important than with flat
      • Off-center convex pressure can cause leaks and skin problems
      • Take extra time to position correctly

      Skin must be completely dry:

      • Even slight moisture prevents good adhesion
      • Especially important with extended-wear adhesive
      • Pat dry and wait 30 seconds if needed

      Don't stretch the barrier:

      • Apply without pulling or stretching
      • Stretching creates tension that can cause early lift
      • Let barrier sit naturally on your contours

      Pressure application matters:

      • Firm, sustained pressure activates adhesive better
      • Don't just pat it on—really press
      • Spend time ensuring edges are well-adhered

      How Long to Wear:

      Typical wear time: 5-7 days for most users with Flextend

      Change sooner if:

      • Edge lifting begins
      • Leakage occurs
      • Skin irritation develops
      • Adhesive shows visible erosion
      • Barrier feels loose or insecure

      Some users achieve 7+ days, especially with:

      • Lower output volume
      • Formed output (colostomy)
      • Good skin condition
      • Proper application technique
      • Use of accessories (paste, rings) as needed

      Understanding Convexity

      What convexity does:

      Convex barriers have a curved shape (like a shallow dome or dish) that:

      • Applies gentle, even pressure around the stoma
      • Encourages retracted or flush stomas to protrude
      • Creates better drainage angle into the pouch
      • Helps seal on uneven or soft abdomens
      • Prevents output from pooling under the barrier

      When you need convex:

      Signs you may need convex support:

      • Stoma sits flush with or below skin level
      • Stoma retracts when you sit or bend
      • Frequent leaks despite proper flat barrier application
      • Output pools around stoma base before entering pouch
      • Soft abdomen where stoma "sinks in"
      • Uneven peristomal plane with creases or folds
      • Your ostomy nurse recommends convex after fitting assessment

      Stoma types that often need convex:

      • Retracted stomas (below skin level)
      • Flush stomas (even with skin level)
      • Stomas in soft tissue that offers little natural support
      • Loop stomas that are partially retracted
      • Stomas surrounded by creases or skin folds

      When flat is sufficient:

      Flat barriers work well when:

      • Stoma protrudes ½ inch or more above skin level
      • Peristomal plane is relatively even and firm
      • You have no leakage issues with flat barriers
      • Stoma maintains protrusion during movement

      Don't use convex if you don't need it—unnecessary pressure can cause complications.

      Convex Levels Explained

      Convex barriers come in different depths:

      Light/Shallow Convex:

      • Gentle curve, mild pressure
      • For slight retraction or soft abdomens
      • Often first choice when moving from flat to convex
      • Most comfortable for extended wear

      Standard/Moderate Convex:

      • More pronounced curve, moderate pressure
      • For moderate retraction or uneven planes
      • Most common convex prescription
      • Balances support with comfort

      Deep Convex:

      • Pronounced curve, firm pressure
      • For significant retraction or very challenging anatomy
      • Requires clinical fitting and monitoring
      • Highest pressure level

      This barrier's convexity level depends on specific SKU—verify with product number or packaging. Most standard New Image convex barriers are moderate level.

      How to choose:

      • Start with least convexity that solves your problem
      • Your ostomy nurse should assess and recommend
      • Convexity can be adjusted as your stoma matures or body changes
      • Some users need different convexity for different activities

      Flextend vs Standard vs CeraPlus Adhesives

      Understanding Hollister adhesive options:

      Flextend (This Product):

      Characteristics:

      • Extended-wear formulation
      • Excellent erosion resistance
      • Durable adhesion over time
      • Standard thickness

      Best for:

      • Users wanting 5-7 day wear time
      • Those with erosive output
      • Standard skin (not overly sensitive, not severely damaged)
      • Most ostomy users—this is the workhorse adhesive

      Advantages:

      • Longer wear time than standard
      • Resists breakdown well
      • Reliable, proven performance
      • Good balance of adhesion and skin-friendliness

      Standard Adhesive:

      • Basic hydrocolloid
      • 3-4 day wear typically
      • Less erosion resistant than Flextend
      • Lower cost
      • Adequate for many users

      CeraPlus:

      • Advanced skin protection formula
      • Contains ceramide to support skin health
      • Very gentle on sensitive or damaged skin
      • Extended-wear capability
      • Higher cost

      Which to choose:

      Choose Flextend (this product) if:

      • You want extended wear (5-7 days)
      • You have normal to slightly sensitive skin
      • You need good erosion resistance
      • You want proven, reliable adhesive
      • This is standard choice for most users

      Choose CeraPlus if:

      • You have very sensitive skin
      • Peristomal skin is damaged or irritated
      • You want ceramide skin conditioning
      • Ostomy nurse recommends for skin health
      • Cost is not primary concern

      Choose Standard if:

      • You change barriers frequently by choice
      • Budget is primary concern
      • Your wear time is naturally shorter (3-4 days adequate)

      Most users find Flextend provides the best balance of performance, wear time, and cost.

      Troubleshooting Convex Barriers

      "The barrier causes redness or indentation on my skin."

      This suggests pressure is too firm:

      • You may need lighter convexity level
      • Opening might be cut too small (pressure on stoma)
      • You may not need convex at all
      • Consult ostomy nurse for fitting reassessment

      Proper convex use should not cause:

      • Deep indentations lasting >30 min after removal
      • Persistent redness or irritation
      • Pain during wear
      • Bruising or tissue damage

      "I'm still getting leaks even with convex."

      Check:

      • Is opening cut correctly? Too large undermines convex benefit
      • Is barrier centered properly? Off-center reduces effectiveness
      • Is convexity level appropriate? May need deeper convex
      • Is application technique correct? Ensure firm, complete adhesion
      • Do you need accessories? Barrier rings or paste may help
      • Is pouch attached securely? Coupling must be fully engaged

      "The barrier edge lifts before output reaches it."

      This is unusual with Flextend. Consider:

      • Skin not completely dry during application
      • Insufficient initial pressure when applying
      • Body moisture/perspiration — may need skin prep
      • Skin folds or movement — accessories like strips may help
      • Need different adhesive — try CeraPlus if skin is damaged

      "The barrier feels uncomfortable or bulky."

      Convex barriers have more profile than flat:

      • This is normal—there's a learning adjustment period
      • Most users adapt within 1-2 weeks
      • Ensure you're using smallest coupling size needed (45mm is smallest)
      • Consider clothing adjustments or ostomy garments
      • If persistent discomfort, evaluate if convexity is truly needed

      "My stoma seems irritated or red after using convex."

      Possible causes:

      • Opening cut too small (pressure on stoma)
      • Convexity too deep for your needs
      • Stoma naturally irritated from other factors
      • Need to verify opening size is adequate

      Stomas should not be irritated by proper convex use. If irritation persists, consult healthcare provider.

      Application Best Practices

      For best results with convex barriers:

      Skin preparation:

      • Clean and dry completely—no shortcuts
      • Consider skin prep wipe if you perspire heavily
      • Remove all adhesive residue from previous barrier
      • Assess skin before each application

      Accurate cutting:

      • Measure stoma each time initially
      • Cut precisely—1-2mm larger than stoma
      • Use sharp scissors for clean cuts
      • Take your time—proper opening size is crucial for convex

      Centering technique:

      • Use mirror for visual confirmation
      • Take extra time to position correctly
      • Don't rush this step
      • Proper centering is THE most important factor

      Firm application:

      • Press firmly and systematically
      • Spend 1-2 minutes on application
      • Ensure complete edge adhesion
      • Your effort here pays off in wear time

      Allow adhesive to set:

      • After application, remain still for 2-3 minutes
      • Allow adhesive to bond fully before moving
      • Avoid immediate bending or strenuous movement
      • Give adhesive time to develop full adhesion

      Use accessories when needed:

      • Barrier rings for filling gaps
      • Paste for creases or folds
      • Strips for edge security
      • Ostomy nurse can recommend appropriate accessories

      45mm Coupling Benefits

      Why 45mm is the smallest New Image option:

      Advantages of 45mm coupling:

      Most discreet profile:

      • Smallest flange in New Image system
      • Least bulk under clothing
      • Most compact hardware
      • Ideal for smaller body types

      Best for smaller stomas:

      • Appropriate for smaller stoma sizes
      • Works when barrier opening needed is ≤25mm (1")
      • Pediatric patients often use 45mm
      • Petite adults often prefer this size

      Comfortable fit:

      • Less weight than larger couplings
      • More flexibility with small stomas
      • Easier to position on certain body areas

      When 45mm may not be ideal:

      Consider larger coupling (57mm or 70mm) if:

      • Stoma is larger than 25mm (1")
      • You need more extensive barrier coverage
      • Larger coupling recommended for your body type/stoma location
      • You find 45mm feels too small

      Your ostomy nurse determines appropriate coupling size based on stoma size, location, body contours, and output type.

      Technical Specifications

      Product Name: Hollister New Image Convex Barrier with Flextend
      System: Two-piece with plastic coupling flange
      Manufacturer: Hollister Incorporated

      Barrier Profile:

      • Type: Convex (curved for stoma protrusion)
      • Convexity level: Varies by specific SKU (typically standard/moderate)
      • Best for: Retracted or flush stomas, soft abdomens, uneven peristomal planes

      Adhesive:

      • Type: Flextend extended-wear hydrocolloid
      • Characteristics: Erosion-resistant, durable, long-lasting
      • Typical wear time: 5-7 days
      • Formulation: Advanced hydrocolloid for extended wear

      Opening:

      • Type: Cut-to-fit
      • Size range: Up to 25mm (1 inch) diameter
      • Customization: Trim to exact stoma size at point of care

      Coupling/Flange:

      • Size: 45mm (1¾ inches) diameter—smallest New Image coupling
      • Type: Snap-on plastic coupling
      • Compatibility: All Hollister New Image 45mm pouches (drainable, closed, urostomy)
      • Security: Audible click confirmation when pouch attached

      Materials:

      • Adhesive: Flextend hydrocolloid
      • Backing: Low-profile, comfortable materials
      • Latex: Not made with natural rubber latex (latex-free)

      Wear Time:

      • Expected: 5-7 days for most users
      • Some achieve: 7+ days with proper application and care
      • Change sooner if: Lifting, leakage, irritation, or adhesive erosion noted

      Skin Suitability:

      • Normal to slightly sensitive skin
      • Convex appropriate for your stoma type and anatomy
      • Not damaged or severely irritated (consider CeraPlus if so)

      Sterility and Use:

      • Sterility: Individually packaged sterile
      • Use: Single-use, replace every 5-7 days or as needed
      • Patient: Single-patient use only
      • Shelf life: Check package for expiration date

      Packaging: Typically 5 barriers per box (verify specific SKU)
      Storage: Store in cool, dry place; keep sealed until use

      Clinical Applications: ✓ Retracted stomas
      ✓ Flush stomas (level with skin)
      ✓ Soft or uneven abdomens
      ✓ Stomas requiring gentle pressure for protrusion
      ✓ Extended wear time needs (5-7 days)
      ✓ Users with erosive output requiring durable adhesive
      ✓ Two-piece system users wanting smallest coupling

      Ordering Guidance

      When to choose this barrier:

      • Your stoma is retracted or flush (not protruding adequately)
      • You have soft abdomen where stoma tends to retract
      • Your ostomy nurse recommended convex support
      • You want extended wear time (5-7 days)
      • Your stoma is small to medium (cuts up to 25mm/1")
      • You prefer smallest coupling profile (45mm)
      • You need Flextend erosion resistance

      Confirming you need convex:

      Work with ostomy nurse to assess:

      • Stoma protrusion level
      • Peristomal plane characteristics
      • Current leakage patterns
      • Skin condition
      • Appropriate convexity level

      Don't self-prescribe convex without clinical assessment—improper use can cause complications.

      Product specifications to verify:

      Must match your needs:

      • Convexity: This is convex barrier (not flat)
      • Coupling size: 45mm
      • Opening: Cut-to-fit up to 25mm (1")
      • Adhesive: Flextend extended-wear

      What's compatible:

      • All New Image 45mm pouches work with this barrier
      • Drainable, closed, or urostomy pouches
      • With or without filters
      • Beige or transparent film

      Quantity considerations:

      Typical usage:

      • Replace barrier every 5-7 days
      • 4-6 barriers per month typically
      • One box (5 barriers) = approximately one month supply

      For complete system:

      • Barriers: 4-6 per month (this product)
      • Pouches: 10-30 per month (changed more frequently)
      • Ratio: 2-5 pouches per barrier cycle

      Cost considerations:

      • Convex barriers cost more than flat
      • Extended-wear formulation may cost more than standard
      • Longer wear time reduces monthly barrier consumption
      • Consider value per day rather than per unit

      Insurance coverage:

      • Most plans cover convex barriers when medically necessary
      • Requires documentation of stoma assessment
      • May need letter of medical necessity from ostomy nurse
      • Work with supply company for insurance coordination

      Building your convex system supply:

      Essential items:

      • Convex barriers (this product)
      • New Image 45mm pouches
      • Adhesive remover
      • Scissors for cutting barriers

      Often helpful with convex:

      • Barrier rings (fill gaps)
      • Barrier paste (seal creases)
      • Skin prep wipes (improve adhesion)
      • Barrier strips (edge security)

      First-time convex users:

      Important steps:

      • Get proper fitting from ostomy nurse
      • Learn correct application technique
      • Understand how much pressure is appropriate
      • Know signs that convexity isn't working
      • Have follow-up assessment scheduled

      Convex barriers require proper fitting and technique—don't hesitate to ask for help from your ostomy nurse for demonstrations and follow-up assessments.

      Pro tip: Take photos of your stoma and barrier placement after application (especially the centering). This helps you see what proper positioning looks like and provides reference for future applications. It's also helpful to show your ostomy nurse if you're having problems.

      For questions about convex barrier selection, proper convexity level, application technique, troubleshooting pressure or leakage issues, consult with your ostomy care nurse or contact Hollister customer service for expert fitting guidance and support.

    • No reviews yet

      Add yours

    Testimonials from Google

    See all reviews

    Your cart — 0

    You cart is currently empty

    Login