Why ASO Design for Ankle Stabilization and Injury Prevention
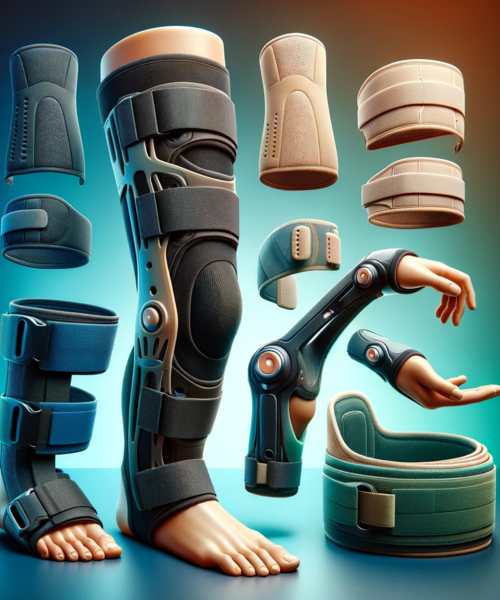
The ASO (Ankle Stabilizing Orthosis) represents one of the most trusted and clinically proven ankle brace designs, developed by athletic trainers and widely used in professional sports, collegiate athletics, and rehabilitation settings for over three decades. The figure-8 internal strap configuration mimics the anatomical support provided by athletic tape, creating a biomechanical lock that prevents excessive inversion (rolling inward) and eversion (rolling outward) while maintaining full dorsiflexion and plantarflexion (up-down motion) necessary for walking, running, and jumping. The Speed Lacer system replaces traditional lacing with a quick-pull mechanism that achieves consistent, firm compression in seconds without the complexity of tying laces, making this brace ideal for athletes who need to adjust support between activities or users with limited hand dexterity. The integrated medial and lateral plastic stays provide additional structural resistance against side-to-side movement, creating a comprehensive stabilization system that addresses the multi-directional instability common after ankle sprains.
Key Features
- MedSpec ASO Speed Lacer design (clinical-grade athletic trainer standard)
- Size XX-Large for users with larger ankle circumference or shoe size
- Universal design fits both left and right ankle
- Speed Lacer quick-pull tightening system for rapid consistent compression
- Figure-8 internal strap configuration for anatomical ankle lock
- Bilateral plastic stays (medial and lateral) prevent inversion/eversion
- Ballistic nylon shell for durability and longevity
- Elastic cuff closure at top for additional security
- Low-profile design fits inside most athletic and walking shoes
- Lightweight construction doesn't impede performance
- Breathable materials for moisture management
- Lace-lock system maintains tension without loosening
Benefits
- Quick application in 30-60 seconds (vs. 5-10 minutes for athletic tape)
- Provides tape-like support that's reusable and adjustable
- Prevents ankle rolling (inversion sprains - most common injury)
- Allows natural up-down ankle motion for normal gait and sports
- Fits comfortably in shoes without excessive bulk
- Trusted by athletic trainers, physical therapists, and orthopedists
- Cost-effective compared to repeated athletic taping
- Suitable for prevention, acute injury, and chronic instability
- Machine washable and durable for extended use
Clinical Applications
✓ Acute ankle sprains (Grade I, II, or III)
✓ Chronic ankle instability (repeated sprains, "weak ankles")
✓ Lateral ankle ligament injuries (ATFL, CFL)
✓ Medial ankle ligament injuries (deltoid)
✓ Post-surgical ankle stabilization and protection
✓ Return-to-sport support after injury
✓ Preventive support for high-risk activities
✓ Peroneal tendon subluxation or tendinitis
✓ Ankle arthritis requiring stability
✓ Occupational ankle protection (uneven surfaces, lifting)
Usage & Application
Understanding Ankle Brace Types and Support Levels
Ankle braces vary significantly in support level and design:
Compression Sleeves:
- Basic compression and warmth
- No structural support or strapping
- For very mild instability or prevention only
- Minimal injury protection
Lace-Up Ankle Braces (ASO - This Product):
- Figure-8 strapping for inversion/eversion control
- Plastic stays for additional stability
- Moderate-to-high support level
- Allows full dorsiflexion/plantarflexion
- For active use, sports, and moderate instability
Stirrup/Hinged Ankle Braces:
- Rigid side supports with hinge for up-down motion
- Maximum lateral stability
- For severe sprains or post-surgical
- Bulkier, may not fit in all shoes
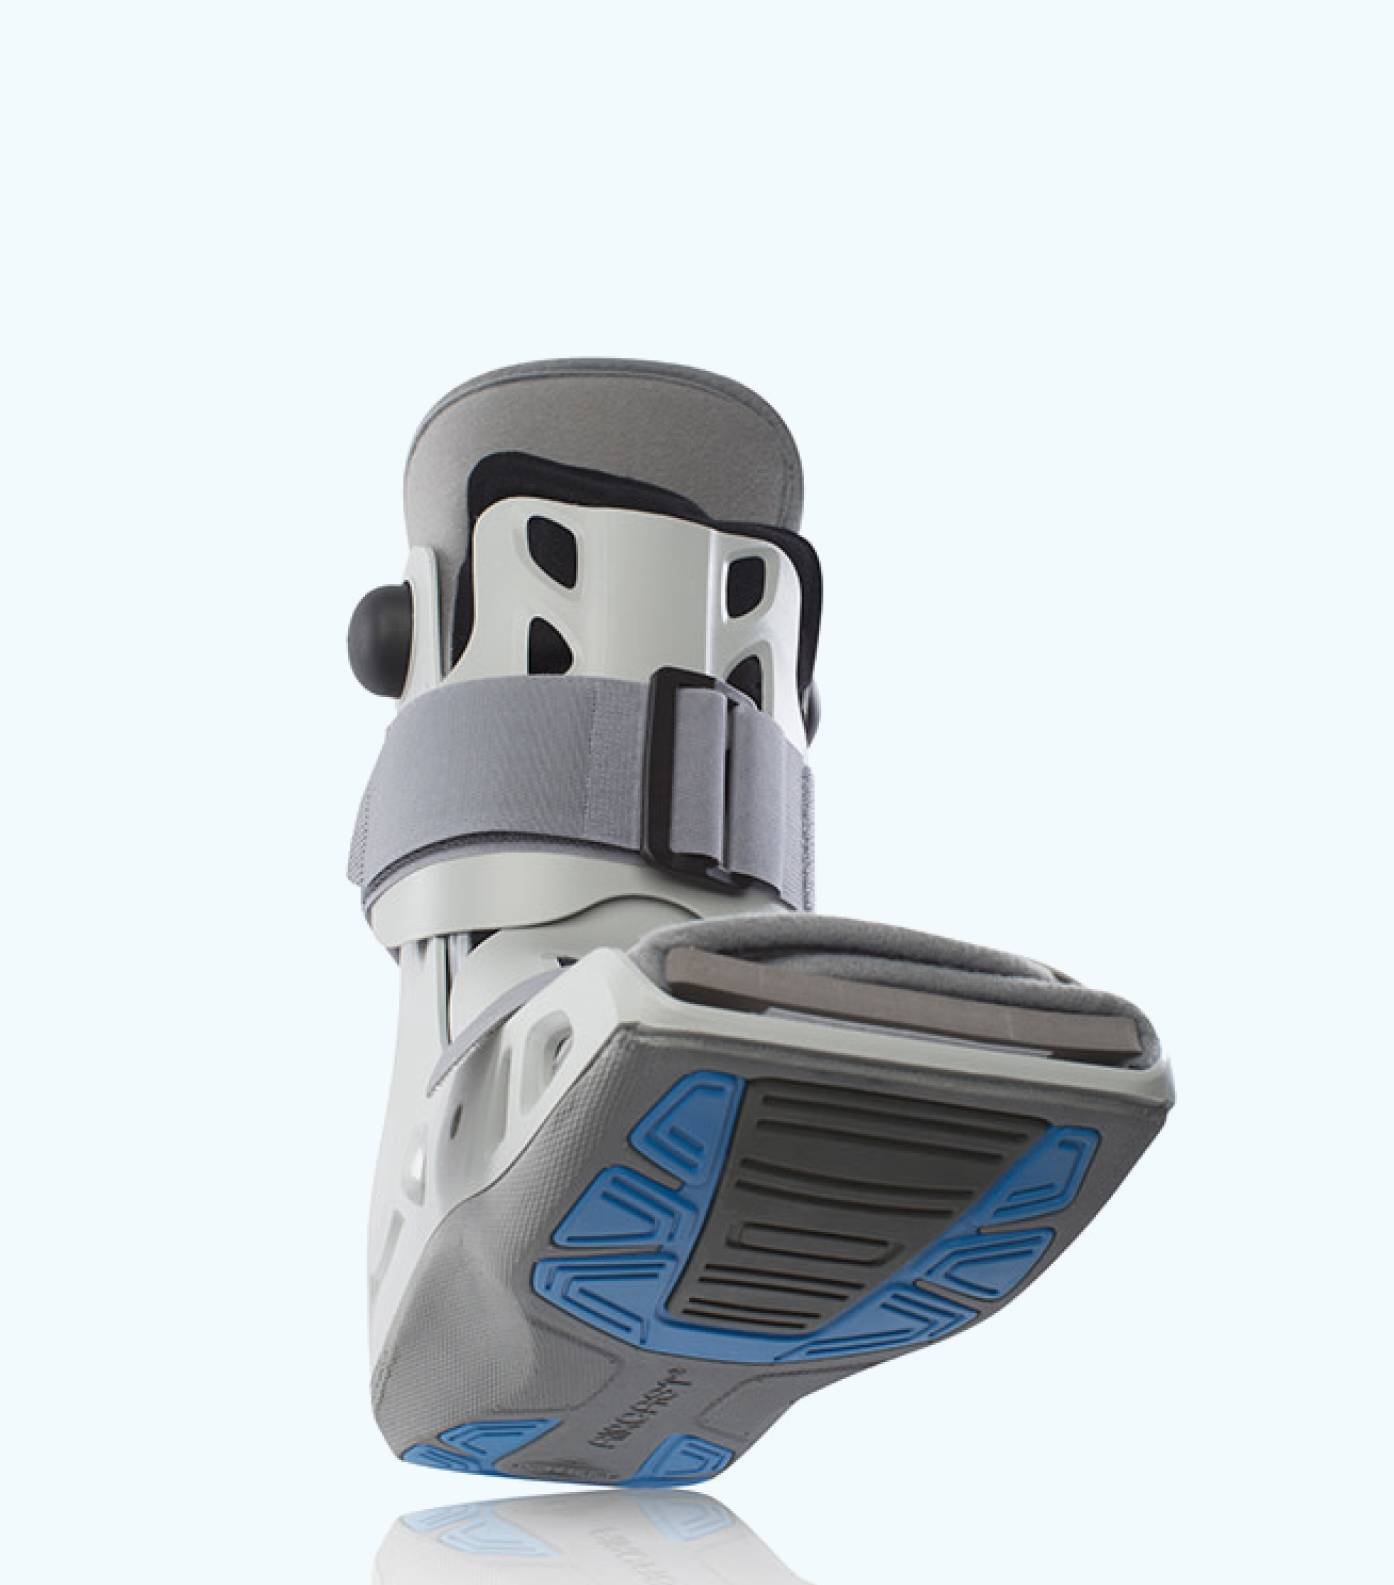
Rigid Walking Boots:
- Complete immobilization
- For severe injuries requiring no ankle movement
- Temporary use during acute healing phase
- Not for sports or normal activities
ASO Speed Lacer Positioning: High-moderate support between compression sleeves and rigid braces—ideal for users needing strong lateral stability while maintaining mobility for sports and daily activities.
When ASO Speed Lacer is Appropriate
Ideal Candidates:
- History of ankle sprains (one or multiple)
- Chronic ankle instability ("weak ankles," feeling of giving way)
- Current ankle sprain (Grade I or II, or post-acute Grade III)
- Return to sports after injury
- Preventive support during high-risk activities (basketball, soccer, trail running)
- Occupational ankle protection
- Ankle ligament laxity
- Proprioception deficit (poor balance/ankle position awareness)
Not Appropriate If:
- Severe acute fracture (need rigid immobilization)
- Immediate post-surgical period (typically need boot or rigid brace)
- Severe arthritis preventing any ankle motion
- Open wounds or active infection on ankle
- DVT or severe circulatory problems
- Brace doesn't fit (check sizing carefully)
Consult healthcare provider if unsure whether ASO provides adequate support for your specific injury or condition.
Understanding ASO Figure-8 Design
Biomechanical Principles:
The figure-8 strap pattern mimics athletic taping technique:
- Inversion Control (Rolling Inward):
- Most common ankle sprain mechanism
- Figure-8 strap pulls lateral (outside) ankle downward
- Prevents excessive inward rolling
- Critical for preventing lateral ligament injuries (ATFL, CFL)
- Eversion Control (Rolling Outward):
- Less common but still important
- Figure-8 strap pulls medial (inside) ankle downward
- Prevents excessive outward rolling
- Protects deltoid ligament (medial side)
- Maintains Functional Range:
- Allows dorsiflexion (toes up) for walking upstairs, squatting
- Allows plantarflexion (toes down) for push-off during gait, jumping
- Critical for normal movement and athletic performance
ASO vs. Athletic Tape:
ASO Advantages:
- Reusable (vs. single-use tape)
- Consistent support (doesn't loosen with sweat)
- Cost-effective over time
- User can apply independently
- Adjustable throughout day
Athletic Tape Advantages:
- Thinner profile (slightly better shoe fit)
- Custom contouring to exact anatomy
- Maximum support when freshly applied
- Preferred by some elite athletes
Most Users: ASO provides 80-90% of tape support with far greater convenience.
Understanding Size XX-Large
Proper sizing critical for effectiveness:
MedSpec ASO Sizing: Based on shoe size:
- Small: Women's 6-8, Men's 5-7
- Medium: Women's 8.5-11, Men's 7.5-10
- Large: Women's 11.5-13, Men's 10.5-12
- X-Large: Women's 13.5+, Men's 12.5-14
- XX-Large: Men's 14.5+ - THIS PRODUCT
Alternative Sizing (Ankle Circumference): Some brands size by measuring around ankle joint:
- XX-Large typically fits ankle circumference >11-12 inches
Measuring for Size:
- By Shoe Size (Easiest):
- If you wear men's size 15 or 16, XX-Large appropriate
- Shoe size correlates well with ankle size for most users
- By Ankle Circumference (Most Accurate):
- Measure around narrowest part of ankle (just above ankle bones)
- Measure while standing, not sitting
- XX-Large typically >11-12 inches circumference
Signs XX-Large is Correct:
- Speed laces pull to comfortable tightness without maxing out
- Figure-8 straps wrap around ankle with adequate overlap
- Brace feels snug but not excessively tight
- No excessive bunching or gapping
- Fits comfortably in shoes
Signs of Wrong Size:
- Too Small: Can't tighten laces enough, figure-8 straps barely overlap, excessive pressure
- Too Large: Laces pull to maximum and still loose, straps wrap excessively, brace slides around
Adjacent Sizes:
- X-Large: If XX-Large feels too loose or bulky
- Custom Options: If XX-Large too small, consult MedSpec for custom solutions
XX-Large Considerations:
- Most common in men with shoe sizes 15+
- Athletes with muscular builds may need XX-Large even with smaller shoe size
- Ensure adequate shoe size to accommodate brace (may need 1/2 size up)
Pre-Application Preparation
Sock Selection:
- Wear athletic sock of moderate thickness
- Too thin: Brace may cause irritation
- Too thick: Brace may not fit in shoe
- Moisture-wicking preferred for sports use
Shoe Selection:
- Athletic shoes with adequate width and volume
- May need to size up 1/2 size to accommodate brace
- High-top shoes provide additional support but not required
- Avoid very narrow or minimalist shoes
Skin Preparation:
- Clean, dry skin
- No open wounds, blisters, or severe rashes
- Trim or file any calluses that could cause pressure points
- No lotions or oils (reduces strap grip)
First-Time Application:
- Sit in chair for initial fitting
- Allow 10-15 minutes for first application (becomes faster with practice)
- Read all instructions included with brace
- Watch manufacturer video if available online
Applying ASO Speed Lacer Step-by-Step
Initial Setup:
- Orient brace correctly:
- Identify inside vs. outside (medial vs. lateral stay positions)
- Locate speed lace tabs (should be on outside/lateral side)
- Note top vs. bottom (ankle opening vs. heel cup)
- Universal design works on either left or right ankle
- Loosen all straps completely:
- Pull Speed Lacer to maximum looseness
- Open elastic cuff strap at top
- Loosen figure-8 straps
- Brace should be as open as possible for foot insertion
Foot Insertion:
- Insert foot into brace:
- Sit with knee bent, foot off floor
- Slide foot into brace like putting on shoe
- Ensure heel fully seated in heel cup
- Sock should be smooth without wrinkles
- Position brace on ankle:
- Ankle bones (malleoli) should fit in appropriate openings
- Medial stay on inside of ankle
- Lateral stay on outside of ankle
- Top of brace should sit on lower leg (above ankle joint)
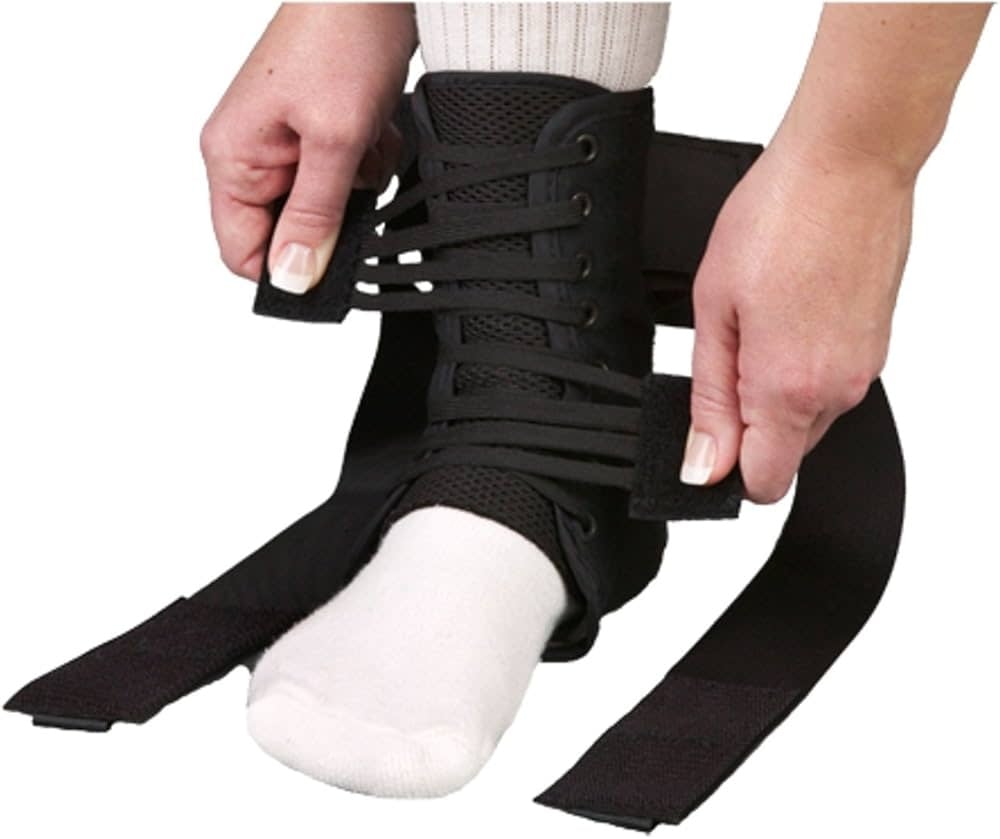
Figure-8 Strap Application:
- Apply internal figure-8 straps:
- CRITICAL STEP for proper support
- Start with strap on lateral (outside) side
- Pull strap across top of foot, under arch, around heel
- Attach to opposite side creating figure-8 pattern
- Pull firmly—this strap provides primary inversion control
- Repeat with medial (inside) strap
- Both straps should create X-pattern over top of foot
- Adjust figure-8 tension:
- Should feel snug but not cutting off circulation
- Arch should feel supported
- Ankle should feel "locked" but not painful
Speed Lacer Application:
- Engage Speed Lacer system:
- Locate Speed Lacer pull tabs (usually on lateral side)
- Pull tabs firmly and evenly upward
- Laces tighten automatically through system
- Continue pulling until comfortable, firm compression achieved
- Laces should lie flat against brace body
- Secure lace-lock:
- Once desired tightness reached, engage lace-lock mechanism
- This prevents laces from loosening during activity
- Test by tugging on brace—should stay firmly in place
Final Securing:
- Close elastic cuff:
- Wrap elastic cuff around top of brace
- Secure with Velcro or closure system
- Provides additional security preventing brace from sliding down
- Should feel snug but not constricting
- Final fit check:
- Stand up and walk a few steps
- Rock ankle side-to-side—should feel restricted
- Point toes up and down—should feel relatively free
- Ankle should feel stable and supported
- No excessive tightness, numbness, or pain
Speed Lacer Advantages:
- 30-60 second application after initial setup
- Consistent tightness every time
- Easy to adjust between activities
- No lace-tying required (good for users with limited hand dexterity)
Fitting Inside Shoes
Shoe Insertion:
- Loosen shoe laces completely
- Insert braced foot into shoe:
- May need to use shoehorn
- Ensure brace stays positioned correctly
- Heel should fully seat in shoe heel cup
- Tighten shoe laces:
- Lace snugly over brace
- May skip eyelets where brace is bulkiest
- Shoe provides secondary containment for brace
Shoe Fit Tips:
- Brace adds bulk—may need larger shoe size
- Width often more important than length
- Athletic shoes typically accommodate braces better than casual shoes
- High-tops provide additional support but not required
If Brace Doesn't Fit in Shoe:
- Try larger shoe size (1/2 to 1 full size up)
- Try wider shoe width
- Consider different shoe style (more volume)
- XX-Large brace requires adequate shoe size
Adjustment Period
Initial Wear Schedule:
Day 1-2:
- Wear 2-3 hours during low-activity periods
- Walk around house, short errands
- Monitor for pressure points, excessive tightness
- Remove if numbness, tingling, or severe discomfort
Day 3-5:
- Increase to 4-6 hours
- Begin wearing during light exercise (walking, stationary bike)
- Adjust figure-8 straps and Speed Lacer as needed
Week 2+:
- Progress to all-day wear if needed
- Wear during sports and high-risk activities
- May not need to wear during all activities (remove during rest periods)
Why Gradual Introduction:
- Allows skin to adapt to pressure points
- Identifies any fit issues before committing to full-time use
- Muscles and proprioception adapt to supported state
Daily Wear Guidelines
When to Wear:
- During sports and athletic activities
- During work if job involves walking, standing, uneven surfaces
- Preventively during high-risk activities (hiking, recreational sports)
- Throughout day if chronic instability present
- During physical therapy exercises as directed
When to Remove:
- At night during sleep (unless instructed otherwise)
- During swimming or bathing
- During complete rest periods
- If skin irritation develops
- When not needed for low-risk activities
Wearing Duration:
- Can wear all day if properly fitted
- Take off periodically to inspect skin
- Remove at night to allow skin recovery
- Most users wear only during activities requiring support
Activity-Specific Guidance
Basketball, Volleyball, Racquet Sports:
- ASO excellent for these activities (originally designed for basketball)
- Prevents common inversion injuries from jumping, cutting, landing
- Allows explosive movements while providing stability
- Wear throughout practice and games
- May remove between games for brief rest
Running and Jogging:
- Suitable for road running and trail running
- Particularly important on uneven terrain
- May feel slightly bulky initially but adapts with use
- Consider gait analysis if brace feels awkward
Soccer, Football, Field Sports:
- Good support for cutting and lateral movements
- Fits in cleats (may need larger size)
- Used by many professional athletes
- May need reinforcement with athletic tape for contact sports
Hiking and Outdoor Activities:
- Essential for uneven terrain and loose surfaces
- Prevents rolling on rocks, roots, unstable ground
- Consider XX-Large may be bulkier in hiking boots
- Pack in daypack for multi-day trips (wear when needed)
Daily Activities and Work:
- Walking, standing, light labor: Excellent support
- Heavy lifting: Provides stability during load bearing
- Uneven surfaces (construction, warehouse): Injury prevention
- Retail, healthcare workers: Reduces fatigue from standing
Monitoring and Troubleshooting
Normal Sensations:
- Firm compression around ankle
- Restricted side-to-side motion
- Slight pressure at figure-8 strap points
- Warmth (improved circulation)
- Enhanced ankle position awareness
Concerning Symptoms (Remove Immediately):
- Numbness or tingling in foot or toes
- Excessive tightness or pain
- Skin discoloration (white, blue, red beyond normal)
- Swelling below brace
- Severe itching or rash
Common Issues and Solutions:
Brace Slides Down During Activity:
- Ensure elastic cuff at top is properly secured
- May need smaller size
- Sock may be too slippery—try different sock
- Speed Lacer may not be tight enough
Pressure Points on Ankle Bones:
- Adjust figure-8 straps to redistribute pressure
- Ensure brace positioned correctly (malleoli in proper openings)
- Add thin padding over pressure points if persistent
- May indicate incorrect size
Speed Lacer Loosens During Activity:
- Ensure lace-lock mechanism engaged
- May need to retighten once or twice during extended activity
- Check that laces aren't frayed or damaged
Difficulty Getting Brace On/Off:
- Loosen all straps completely before insertion
- Use shoehorn
- Practice makes easier—initial applications take longer
- Consider asking for assistance first few times
Brace Doesn't Fit in Shoes:
- Try larger shoe size
- Try different shoe style with more volume
- XX-Large requires adequate shoe accommodation
- Consider wearing with athletic shoes only
Skin Care and Hygiene
Daily Skin Monitoring:
- Check skin condition after removing brace
- Look for redness, blisters, abrasions
- Pay attention to areas under plastic stays and straps
- Early intervention prevents progression
Skin Protection:
- Keep skin clean and dry
- Wear appropriate socks (moderate thickness, moisture-wicking)
- Apply moleskin or padding over known pressure points
- Address any hotspots immediately before blistering occurs
Brace Hygiene:
- Sweat and bacteria accumulate in brace materials
- Clean regularly (every 1-2 weeks, more for heavy use)
- Odor indicates need for washing
- Clean brace = healthier skin
Care and Cleaning Instructions
Hand Washing (Recommended):
- Remove any detachable components
- Fill sink with lukewarm water and mild detergent
- Submerge brace, scrub gently with soft brush
- Pay attention to inside surfaces (skin contact areas)
- Rinse thoroughly until no soap remains
- Gently squeeze out excess water
Machine Washing (If Manufacturer Permits):
- Use mesh laundry bag
- Cold water, gentle cycle
- Mild detergent only, no bleach
- Small load
Drying:
- Air dry only—NEVER use dryer heat
- Hang or lay flat to dry
- Avoid direct sunlight or heat sources
- Allow 12-24 hours for complete drying
- Heat damages elastic and plastic components
Frequency:
- Heavy use (daily sports): Wash weekly
- Moderate use: Wash every 2 weeks
- Light use: Monthly or as needed
- Wash whenever odor or visible dirt present
What to Avoid:
- Bleach (damages materials)
- Fabric softener (reduces strap grip)
- Dryer heat (permanently damages brace)
- Dry cleaning chemicals
When to Replace Brace
Signs of Wear Requiring Replacement:
- Loss of elasticity in elastic cuff or Speed Lacer
- Figure-8 straps stretched out, Velcro worn
- Plastic stays cracked or bent
- Speed Lacer mechanism broken or jammed
- Persistent sliding despite correct size and proper application
- Ballistic nylon torn or abraded
- Generally: 6-12 months with daily athletic use; 1-2 years with occasional use
ASO/MedSpec Quality:
- Well-made braces last longer than generic alternatives
- Ballistic nylon extremely durable
- Proper care extends lifespan
- Worth investment for serious athletes or chronic instability
Comparing ASO to Other Ankle Braces
ASO Speed Lacer vs. Basic Lace-Up:
- ASO Speed Lacer: Quick-pull lacing, faster application
- Basic Lace-Up: Traditional laces, slower but precise adjustment
- Choose Speed Lacer if: Want convenience, speed, consistent tension
ASO vs. ASO EVO (Different Model):
- ASO Speed Lacer: Speed lacing with stays
- ASO EVO: Low-profile design, no speed lacing
- Choose Speed Lacer if: Want maximum stability with quick application
ASO vs. Stirrup/Hinged Brace:
- ASO: Figure-8 straps, moderate bulk, allows motion
- Stirrup: Rigid side supports, more bulk, maximum stability
- Choose ASO if: Need high support but want athletic performance
ASO vs. Compression Sleeve:
- ASO: Figure-8 + stays, high support
- Compression Sleeve: Compression only, minimal support
- Choose ASO if: History of sprains or significant instability
ASO vs. Athletic Tape:
- ASO: Reusable, consistent, user-applied
- Tape: Single-use, custom, requires skill to apply
- Choose ASO if: Want convenience and cost-effectiveness
Working with Healthcare Providers
Athletic Training:
- ASO designed by and for athletic trainers
- Commonly recommended for sports injury prevention and recovery
- May use during athletic training sessions
- Trainer can verify proper application and fit
Physical Therapy:
- Often incorporated into ankle rehab programs
- Provides support during strengthening exercises
- Complements, doesn't replace, exercise program
- Therapist can teach proper application technique
Orthopedic Follow-Up:
- Bring brace to appointments
- Provider can assess if adequate support for your injury
- May adjust treatment plan based on brace effectiveness
- May transition to less support as healing progresses
When to Consult Provider:
- Persistent ankle pain despite brace use
- Recurrent sprains with brace on
- New symptoms (locking, severe swelling, deformity)
- Questions about appropriate activity level
- Brace causing skin problems
Insurance and Cost Considerations
Insurance Coverage:
- Many insurance plans cover ankle braces with prescription
- Requires documentation of medical necessity (injury diagnosis)
- May need trial of conservative treatment first
- DME (durable medical equipment) benefit
Out-of-Pocket Cost:
- MedSpec ASO: Moderate-high price range ($50-90 typical retail)
- More expensive than basic sleeves or generic braces
- Less expensive than custom-molded braces
- Good value considering quality, durability, and effectiveness
Cost-Benefit:
- Prevents future injuries (reduces medical costs, missed work/sports)
- Reusable vs. disposable athletic tape (tape costs $3-5 per application)
- One brace can last 1-2 years with proper care
- Worth investment for athletes or those with chronic instability
Long-Term Ankle Health
Brace as Part of Comprehensive Care:
ASO is a tool, not a cure:
- Continue strengthening exercises (peroneal muscles, calf, intrinsic foot muscles)
- Practice balance training (proprioception exercises)
- Address biomechanical issues (overpronation, hip weakness)
- Maintain healthy weight
- Wear appropriate footwear
Avoiding Brace Dependence:
- Don't wear unnecessarily (muscles can weaken)
- Use during high-risk activities but work toward independence
- Progress rehabilitation program to reduce brace need
- Goal: Use brace strategically, not indefinitely for all activities
Tracking Progress:
- Monitor frequency of "giving way" episodes
- Note activities possible with vs. without brace
- Gradually challenge ankle without brace in safe environments
- Work with physical therapist to establish progression plan
Return to Sport Protocol:
- Phase 1: Wear brace during all sports activities
- Phase 2: Wear during competitive activities, remove during practice
- Phase 3: Wear during high-risk activities only
- Phase 4: Brace available but not worn regularly (maintenance/prevention)
Technical Specifications
- Brand: MedSpec
- Model: ASO Speed Lacer with Stays
- Size: XX-Large
- Size Range: Men's shoe size 14.5+ or ankle circumference >11-12 inches
- Fit: Universal (works on left or right ankle)
- Lacing System: Speed Lacer quick-pull tightening with lace-lock
- Strap Design: Figure-8 internal strapping for inversion/eversion control
- Stabilizing Components: Bilateral plastic stays (medial and lateral)
- Construction: Ballistic nylon shell for durability
- Cuff Closure: Elastic cuff with Velcro or hook-and-loop closure
- Profile: Low-profile design fits in most athletic and walking shoes
- Weight: Lightweight construction
- Range of Motion: Full dorsiflexion/plantarflexion allowed; restricted inversion/eversion
- Support Level: High-moderate (clinical-grade)
- Intended Use: Ankle sprains, chronic instability, ligament injuries, return-to-sport support, preventive stabilization
- Activity Level: High—suitable for sports, work, and daily activities
- Color: Typically black (check specific SKU)
- Care: Machine washable (gentle cycle, cold water), air dry only
- Materials: Latex-free construction
- Durability: 6-12 months with daily athletic use; 1-2 years with occasional use
- Clinical Standard: Used by athletic trainers, physical therapists, orthopedists
- Certifications: Medical-grade device
 780 409-1509
 Get directions