Slideshow Items

  • Mobility Accessories
  • mobility/mobility-accessories
  • Mobility
  • mobility
EVO - Evolution

  |  

Evolution Seat Base For Trillium (Mini, Reg, &Tall)

C$60.00
In stock online
In store: Check availability

Available in store

SKU: B07-SB-IR

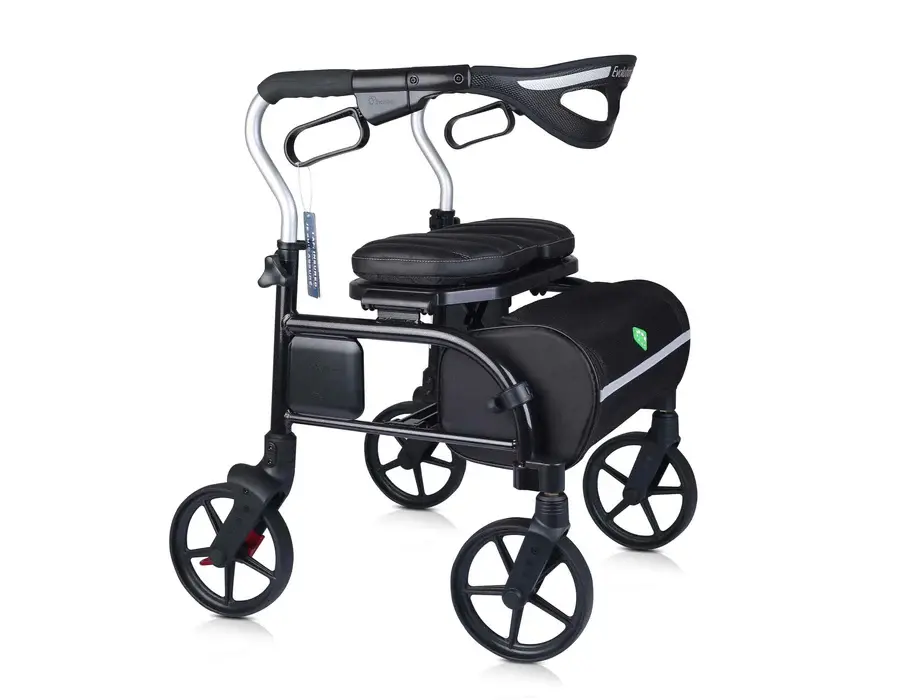
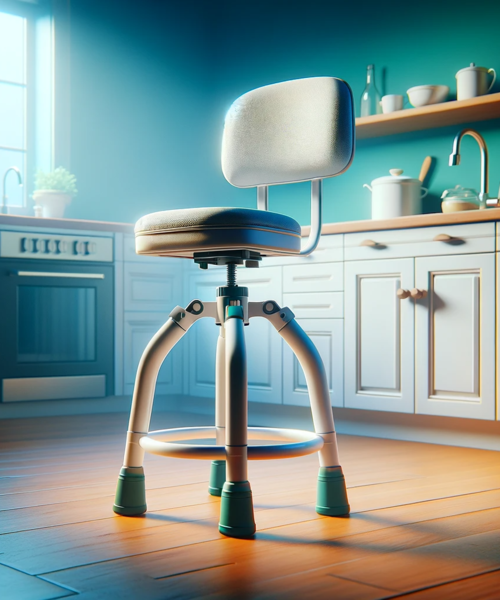
The reinforced steel seat base with pre-aligned mounting holes delivers stable support for Trillium rollators while powder-coated finish maintains correct folding geometry eliminating seat wobble, sagging, or binding during folding and use.

    • Why Reinforced Multi-Point Structural Platform

      The Evolution Trillium rollator's distinctive triangular frame geometry and integrated airless wheel system create unique load distribution patterns that place substantial stress on the seat base platform compared to conventional four-wheeled rollators with pneumatic tires. The triangular frame concentrates user weight on fewer structural points, while the solid airless wheels transmit more impact vibration directly to the frame versus pneumatic wheels that absorb shock. This combination subjects the seat base to higher cyclic loading during normal use, causing premature fatigue, deformation, or cracking in standard seat bases not engineered for Trillium-specific stress patterns. This OEM replacement seat base incorporates reinforced construction with material thickness and strategic reinforcement ribs positioned to handle Trillium's concentrated load paths, maintaining rigid structural support under the full 300-pound user capacity without flexing, bending, or permanent deformation. The pre-aligned mounting holes correspond exactly to Trillium frame attachment points in Mini, Regular, and Tall size variants, ensuring proper geometric relationship between seat platform and frame that preserves the critical folding mechanism alignment—misaligned aftermarket bases cause binding, uneven folding action, or incomplete collapse compromising portability.

      Key Features

      • OEM Trillium-Specific Design: Engineered exclusively for Evolution Trillium rollator frame geometry and load patterns
      • Universal Trillium Compatibility: Fits Trillium Mini, Regular, and Tall models with single base design
      • Reinforced Construction: Heavy-gauge steel or alloy composite (production-dependent) with strategic reinforcement ribs
      • Multi-Point Mounting: Multiple attachment locations distribute seat load evenly across frame structure
      • Pre-Aligned Mounting Holes: Factory-positioned holes match Trillium frame mounting points exactly
      • Correct Folding Geometry: Precise dimensions maintain proper frame alignment during folding and unfolding
      • Level Seat Platform: Horizontal surface keeps padded seat level preventing forward or backward user sliding
      • Adequate Frame Clearance: Design provides clearance from wheels, brakes, and frame members during use and folding
      • Powder-Coated Finish: Black corrosion-resistant coating protects against rust and matches frame styling
      • Smooth Edges: All edges deburred and finished smooth preventing fabric tear or frame paint damage
      • Weight-Distributed Design: Platform geometry spreads user weight across multiple frame contact points
      • Folding Mechanism Clearance: Does not interfere with Trillium's folding pivots or locking mechanisms

      Benefits

      • Restores Factory Support: Returns seat to manufacturer-intended structural stability and comfort
      • Eliminates Seat Movement: Removes wobbling, sagging, and shifting that develops as original base ages
      • Maintains Proper Folding: Correct geometry ensures smooth folding without binding or uneven collapse
      • Extends Equipment Life: Proper base support prevents progressive frame damage from misalignment stress
      • Enhances User Comfort: Stable, level seat platform provides confident sitting without instability concerns
      • Prevents Premature Wear: Even load distribution reduces concentrated stress causing fabric tear or frame damage
      • Supports Full Weight Capacity: Reinforced construction handles complete 300-pound rating without deformation
      • Cost-Effective Repair: $20-40 base replacement versus $300-500 rollator replacement
      • Professional Appearance: Restores like-new seat stability eliminating neglected equipment appearance
      • Enables Fleet Refurbishment: Systematic replacement program for rental or institutional equipment
      • Simplifies Installation: Pre-aligned holes enable quick accurate positioning without custom drilling

      Clinical Applications

      ✓ Replacing cracked or bent bases on aging Trillium rollators (3+ years service)
      ✓ Repairing wobbly seats affecting user confidence and sitting stability
      ✓ Restoring misaligned folding mechanisms binding or catching during collapse
      ✓ Refurbishment of rental equipment between users in home health agencies
      ✓ Fleet maintenance programs in nursing homes and assisted living facilities
      ✓ Medical equipment retail repair services offering rollator restoration
      ✓ Replacement of damaged bases following drops, impacts, or accidents
      ✓ Upgrade from deformed bases preventing proper weight distribution
      ✓ Preventive maintenance before base failure creates safety hazard
      ✓ Professional maintenance for long-term care facility equipment programs
      ✓ Home user self-maintenance extending personally-owned rollator service life

      Usage & Application

      Compatibility Verification: Before purchase, confirm rollator model is Evolution Trillium type by verifying triangular frame geometry and Trillium branding. Check size designation (Mini, Regular, or Tall)—most OEM seat bases fit all three sizes universally, but verify with supplier if uncertain. Inspect existing seat base to confirm similar mounting hole pattern and overall dimensions—if uncertainty exists, photograph existing base and consult supplier before ordering.

      Damage Assessment & Replacement Decision: Inspect existing seat base for replacement indicators including visible cracks in base material or welds, permanent bending or warping preventing level seat surface, mounting holes elongated or stripped from hardware over-tightening, severe rust or corrosion compromising structural integrity, seat wobbling or shifting despite tight mounting hardware, uneven folding action or binding during collapse, gaps between base and frame indicating separation or failure. If any structural damage detected, replace base immediately—compromised base can fail suddenly causing user fall from seated position creating serious injury risk.

      Parts & Tools Required: New Evolution Trillium seat base, mounting hardware (screws, bolts, or clips—may be included with base or reuse original hardware if in good condition), appropriate tools (typically Phillips screwdriver, metric wrenches 10mm/13mm, or hex keys depending on fastener type), wire brush for cleaning frame mounting surfaces, clean cloth for wiping debris, thread locker compound (optional for permanent installation), penetrating oil if existing hardware corroded. If replacing padded seat simultaneously, have new seat ready before disassembly to minimize rollator downtime.

      Seat & Old Base Removal: Position rollator on stable, flat surface and engage parking brakes. Remove padded seat from existing base—attachment method varies by model but typically involves: (1) Fabric seat with Velcro attachment—peel Velcro strips separating seat from base; (2) Seat with snap clips—press release tabs and lift seat off clips; (3) Seat with screw attachment—remove screws securing seat to base. Set seat aside on clean surface taking care not to soil fabric. Locate and remove fasteners securing base to rollator frame—count fasteners during removal to ensure same quantity reinstalled. Note fastener locations, types, and any washers or spacers present for correct reassembly. If fasteners corroded, apply penetrating oil and allow 10-15 minutes before retry. Remove old base completely. Clean frame mounting surfaces with wire brush removing rust, debris, and old thread locker. Wipe clean with cloth.

      Frame Condition Assessment: With base removed, inspect frame mounting areas for damage requiring professional evaluation: cracks in frame tubing near mounting points indicate structural compromise; elongated mounting holes from excessive wear prevent secure base attachment; severe corrosion represents metal loss affecting load capacity; bent or twisted frame prevents proper base alignment. If significant frame damage detected, consult professional repair service or consider rollator replacement—new base cannot correct compromised frame structure.

      New Base Installation & Alignment: Position new seat base on frame, aligning pre-drilled mounting holes with frame attachment points. Verify base orientation—base should center on frame with equal overhang left and right, front edge should align with frame geometry allowing proper seat pad placement. Insert fasteners through base holes into frame mounting points ensuring any washers or spacers positioned correctly based on original configuration. Hand-tighten all fasteners before fully tightening any—this prevents cross-threading and allows position adjustment. Verify alignment: base should sit flat against frame without gaps or rocking, base surface should be level front-to-back and left-to-right (use small level if available), mounting holes should align naturally without forcing fasteners.

      Critical Folding Mechanism Verification: Before final tightening, test folding function to ensure base doesn't interfere with mechanism. Partially fold rollator while observing base position relative to folding pivots, frame members, and wheels. Base must maintain clearance throughout full folding range of motion—no contact, rubbing, or binding should occur. If interference detected, loosen fasteners, adjust base position slightly (if adjustment possible within mounting hole tolerance), and retest. If interference cannot be eliminated, verify base is correct model for Trillium and consult supplier.

      Final Tightening & Seat Reinstallation: Using appropriate tool, tighten first fastener to snug fit (moderate resistance, not final torque). Tighten remaining fasteners in alternating pattern (opposite corners) to distribute pressure evenly. After all snug, apply final torque to each fastener—target is "Hand-tight plus ¼ to ½ turn" (approximately 10-15 Nm or 7-11 lb-ft depending on fastener size). Do not overtighten—excessive torque strips threads or cracks base material. If using thread locker, apply before final tightening (note: makes future removal difficult). Reinstall padded seat onto new base using original attachment method—ensure seat centers properly with equal fabric distribution all around. If Velcro attachment, press firmly for complete engagement. If snap clips, verify all clips fully engaged. If screw attachment, tighten screws evenly.

      Post-Installation Testing: Perform comprehensive testing before returning rollator to user service: (1) Seat stability—sit on seat applying full body weight while rocking side-to-side and front-to-back; no movement, wobbling, or unusual sounds should occur; (2) Folding function—fold and unfold rollator completely 3-5 times verifying smooth action without binding; (3) Frame integrity—inspect all fasteners confirming tight, check base visually for proper seating against frame; (4) Seat pad alignment—verify fabric seat centered and level with no pulling or distortion. If any issues detected, correct before allowing user operation.

      Break-In Period & Retightening: New base installation may experience initial settling during first hours of use as metal-to-metal surfaces mate fully. After first day of use or 1-2 days of normal use, perform retightening check—verify all fasteners remain tight, retorque if any loosening detected. This settling is normal. After break-in period, fasteners should remain tight under normal use. Include seat base inspection in quarterly rollator maintenance routine.

      User Education on Proper Use: Remind users of seat weight limit (typically 250-300 pounds—verify specific model capacity). Educate on proper sitting technique: sit centered on seat, avoid perching on front or back edge, do not rock or lean excessively while seated, ensure parking brakes engaged before sitting. Explain that seat is for brief resting, not prolonged sitting or sleeping. Teach users to visually inspect base periodically—look for cracks, check fasteners, report any wobbling immediately.

      Troubleshooting Installation Issues: Problem: Base holes don't align with frame holes. Solution: Verify base is correct model for Trillium; check base orientation (may be installed backward or rotated incorrectly); inspect frame for damage or misalignment. Problem: Fasteners won't tighten. Solution: Check for cross-threading—remove and restart carefully; verify correct fastener size and thread pitch; inspect frame threads for damage requiring tap and die repair. Problem: Seat still wobbles after installation. Solution: Verify all fasteners properly torqued; check if padded seat itself is worn (seat pad wobble versus base wobble); inspect base for manufacturing defects. Problem: Folding mechanism binds. Solution: Loosen fasteners and adjust base position slightly; verify base is correct model; check for frame damage preventing proper alignment. Problem: Seat pad won't attach properly to new base. Solution: Verify attachment method compatible (Velcro, clips, or screws); check if seat pad worn requiring replacement; ensure base fully seated against frame.

      Long-Term Maintenance Schedule: Monthly inspection (active use): Check fastener tightness, inspect base for cracks or deformation, verify seat pad attachment secure. Quarterly maintenance: Remove seat pad, clean base surface and frame contact area, inspect for rust or corrosion, retighten fasteners if any loosening detected. Annual inspection: Consider preventive base replacement if visible wear, cracks, or deformation developing—replace before failure rather than emergency repair. Document maintenance activities for service history tracking.

      Institutional Fleet Management: For facilities maintaining multiple Trillium rollators, implement systematic seat base inspection and replacement program: Assign unique ID to each rollator for tracking; create maintenance schedule based on service hours or calendar time (recommend base inspection quarterly, replacement every 2-3 years or 500 operating hours for high-use equipment); maintain adequate base inventory; train maintenance staff on proper installation procedures; keep detailed service records tracking base replacement dates and issues discovered; consider preventive replacement during scheduled maintenance rather than reactive failure response.

      Technical Specifications

      • Model Compatibility: Evolution Trillium rollators including Mini, Regular, and Tall models (verify compatibility with supplier as some model year variations may exist)
      • Material: Reinforced steel or alloy composite construction (material varies by production batch)
      • Material Selection Rationale: Steel provides maximum rigidity and load capacity; composite offers lighter weight with adequate strength for smaller users
      • Finish: Powder-coated black for corrosion resistance and aesthetic coordination with frame
      • Mounting Type: Multi-point frame attachment with pre-aligned mounting holes
      • Mounting Hardware: Typically requires 4-8 fasteners (screws, bolts, or clips depending on model)—may be included with base or reuse original hardware
      • Fastener Specification: Metric threading typical (M6 or M8)—verify exact specifications with supplier or inspect original hardware
      • Base Dimensions: Approximately 12-16 inches width × 8-12 inches depth × 1-2 inches height (varies by Trillium size variant)
      • Weight: Approximately 1-2 lb depending on material (steel heavier than composite)
      • Load Capacity: Supports full Trillium weight capacity (typically 300 lb)—verify specific model rating
      • Reinforcement Design: Strategic ribs or thicker material sections at high-stress locations
      • Color: Black standard (matches most Trillium frame finishes)
      • Edge Treatment: Smooth deburred edges prevent fabric and frame damage
      • Installation Time: 30-45 minutes typical for experienced DIY user; 60-90 minutes for first-time installer
      • Tools Required: Phillips screwdriver or metric wrenches (10mm, 13mm typical), hex keys if applicable
      • Expected Service Life: 3-5 years typical use (500-1000+ operating hours) before replacement consideration
      • Intended Use: Replacement seat support platform for Evolution Trillium rollators in home and institutional settings
      • Warranty: Manufacturer limited warranty against defects (verify terms with supplier)
      • Storage: Store in dry location flat to prevent warping if not immediately installed
      • Package Contents: Seat base platform only standard; mounting hardware may be included or sold separately (verify before purchase)
      • Model/SKU: Verify specific SKU with Evolution or authorized distributor as part numbers may vary by production year
    • No reviews yet

      Add yours

    Testimonials from Google

    See all reviews

    Recently viewed

    Your cart — 0

    You cart is currently empty

    Login