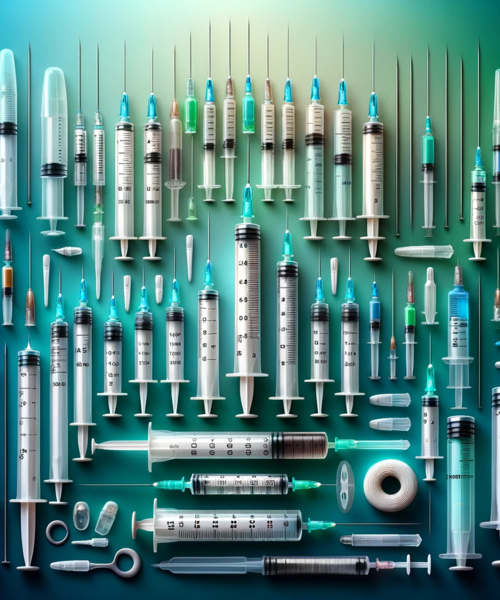
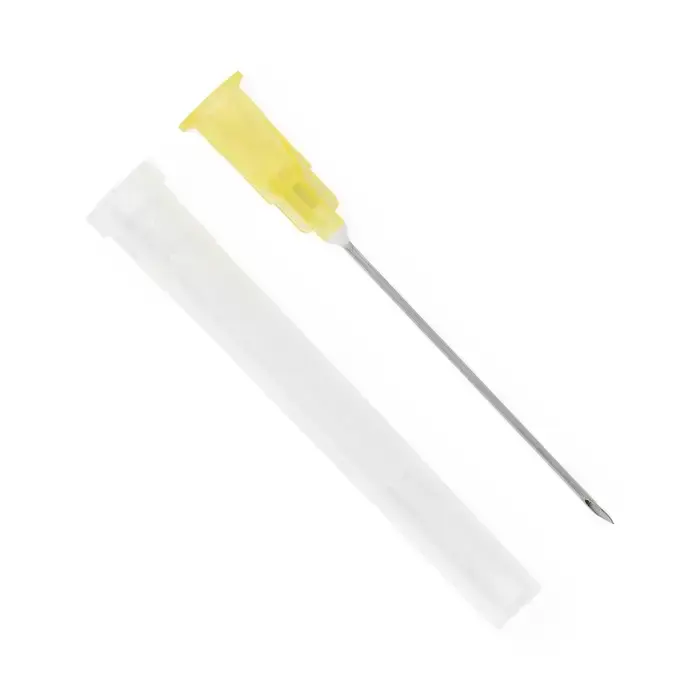
Why 20G × 1" for Versatile Clinical Applications and Viscous Medication Delivery
The 20-gauge needle (0.9mm outer diameter) provides a larger bore suitable for viscous medications, thick suspensions, blood draws, and rapid fluid administration—applications where smaller gauge needles would cause excessive injection force, slow delivery, or needle clogging. The 1-inch (25mm) length is ideal for standard intramuscular injections in the deltoid muscle of average-sized adults, making this combination highly versatile for vaccines, antibiotics, immunoglobulins, and other routine IM medications. This gauge-length pairing is also commonly used for drawing medications from vials (particularly multi-dose vials or medications requiring reconstitution), aspirating fluids from wounds or body cavities, and accessing IV lines or catheters for blood sampling. The regular bevel provides reliable penetration with standard sharpness suitable for general-purpose clinical use, while the color-coded hub (typically yellow per ISO standards for 20G) enables quick gauge identification in busy clinical settings. Compatible with both Luer Lock (threaded) and Luer Slip (push-on) syringes, these needles offer flexibility across different syringe types and clinical workflows.
Key Features & Benefits
Key Features:
- 20-gauge (20G) needle with 0.9mm outer diameter for viscous medication delivery
- 1-inch (25mm) length suitable for intramuscular injections in adults
- Regular bevel for standard penetration and general-purpose use
- Stainless steel cannula for strength, sharpness, and corrosion resistance
- Color-coded hub (typically yellow per ISO 6009 standards for 20G)
- Transparent or translucent hub allows visualization of fluid flashback
- Compatible with both Luer Lock (threaded) and Luer Slip (push-on) syringes
- Latex-free construction for allergy safety
- Sterile, individually packaged in peel-open protective packaging
- Rigid needle shield protects sterility and prevents needlestick injuries before use
- Single-use, disposable design prevents cross-contamination
- Manufactured to meet ISO and ASTM international standards
- Box of 100 needles for clinical inventory management
- Cost-effective for high-volume clinical settings
Benefits:
- Larger bore accommodates viscous medications without excessive force
- Reduces injection time for thick solutions and suspensions
- Appropriate length for deltoid IM injections in average adults
- Facilitates blood draws with adequate flow rates
- Rapid medication administration when needed (emergency situations)
- Color-coded hub prevents gauge selection errors
- Clear hub allows blood flashback visualization (confirms placement)
- Universal syringe compatibility (Luer Lock and Luer Slip)
- Latex-free design protects sensitive patients and healthcare workers
- Sterile packaging ensures infection control compliance
- Rigid shield prevents accidental needlesticks during handling
- Single-use design eliminates sterilization needs and cross-contamination risks
- Reliable Medline quality at cost-effective pricing
- Bulk packaging supports clinical and facility inventory
Clinical Applications
Medline 20G × 1" hypodermic needles are appropriate for:
✓ Intramuscular medication administration in deltoid muscle (adults) ✓ Viscous medication injections (oil-based, thick suspensions) ✓ Antibiotic IM injections (penicillin, ceftriaxone, others) ✓ Immunoglobulin (IG) intramuscular administration ✓ Vitamin B12 injections (intramuscular route) ✓ Hormone therapy injections (testosterone, progesterone oil-based) ✓ Long-acting antipsychotic injections (depot formulations) ✓ Blood draws from peripheral veins, IV lines, or catheters ✓ Medication reconstitution and vial access (drawing from multi-dose vials) ✓ Rapid fluid administration when larger bore needed ✓ Wound irrigation and aspiration procedures ✓ Joint aspiration (arthrocentesis) for diagnostic fluid collection ✓ Abscess drainage and irrigation ✓ Laboratory specimen collection requiring larger needle bore ✓ Veterinary medication administration ✓ Emergency medication administration requiring rapid delivery ✓ Contrast media injection for imaging procedures ✓ IV push medications requiring rapid administration
Usage & Application
Pre-Use Preparation:
- Verify clinical order: Confirm medication or procedure, dose (if applicable), route, patient identity, and check for allergies. Perform standard verification protocols per facility policy.
- Select appropriate syringe: Choose syringe size based on medication volume or fluid to be aspirated. Verify syringe tip type (Luer Lock or Luer Slip)—this needle is compatible with both.
- Gather supplies: Medline 20G × 1" needle (sterile package), appropriate syringe, medication or collection supplies, alcohol swabs, gloves, gauze, adhesive bandage, sharps container, labels (if collecting specimens).
- Hand hygiene: Wash hands thoroughly with soap and water for at least 20 seconds or use alcohol-based hand sanitizer. Don clean gloves per facility protocol or procedure requirements.
- Inspect needle package: Check sterile package for tears, punctures, or moisture contamination. Verify expiration date. Discard if package integrity is compromised or product is expired.
Opening Sterile Package:
- Peel-open technique: Grasp both sides of protective packaging at designated opening area. Pull apart gently to expose sterile needle without contaminating contents.
- Aseptic handling: Touch only the hub (colored plastic base)—never touch the needle shaft, tip, or any part that will contact patient or medication.
- Remove from package: Carefully lift needle by hub, maintaining sterility of shaft and tip.
Attaching Needle to Syringe:
For Luer Lock Syringes (threaded tip):
- Remove protective cap from syringe tip if present
- Align needle hub threads with syringe Luer Lock threads
- Rotate needle clockwise (turn right) while pushing gently until firmly seated
- Continue twisting until you feel definite resistance—typically 1/4 to 1/2 turn
- Verify secure connection by gently tugging on needle hub (should not separate)
- 20G needles require firm attachment due to potential for higher-pressure applications
For Luer Slip Syringes (smooth tapered tip):
- Remove protective cap from syringe tip if present
- Align needle hub with syringe tip
- Push needle hub straight onto syringe tip with firm, steady pressure
- Push until hub is fully seated and flush against syringe barrel
- Verify secure connection by gently tugging on needle hub (should not separate)
- Ensure very firm connection for 20G due to higher flow rates and potential pressures
Drawing Medication from Vials:
- Keep needle shield on initially: Leave rigid needle shield in place while preparing to access vial.
- Prepare vial: Remove flip-off cap from vial if new. Wipe rubber stopper thoroughly with alcohol swab in circular motion. Allow to air dry completely (15-30 seconds).
- Draw air into syringe: Pull plunger back to draw air equal to medication volume needed. This air equalizes vial pressure and facilitates medication withdrawal.
- Remove needle shield: Pull rigid shield straight off needle just before vial access. Set aside carefully or discard immediately into sharps container.
- Insert needle into vial: Hold vial upright on flat surface. Insert needle straight through center of rubber stopper with firm, controlled pressure. The 20G needle penetrates stoppers easily due to larger diameter and sharp bevel.
- Inject air: Push plunger down to inject air into vial airspace (above liquid level, not into medication itself).
- Invert vial: While keeping needle inserted, invert vial so it's upside down. Keep needle tip fully submerged in medication.
- Withdraw medication: Pull plunger back slowly and steadily to draw medication into syringe. Draw slightly past target volume initially to allow for air bubble removal.
- Remove air bubbles: Tap syringe barrel firmly to move bubbles toward needle end. With vial still inverted and needle submerged, push plunger slowly to expel air back into vial. Adjust medication level to exact prescribed dose.
- Verify dose accuracy: Double-check that medication level aligns exactly with prescribed dose marking. Read at eye level to avoid parallax errors.
- Remove needle from vial: Pull needle straight out of rubber stopper with controlled motion. Keep needle pointing upward to prevent medication loss.
Note on changing needles after drawing: For IM injections, some facilities recommend changing to a fresh needle after drawing medication (particularly from ampules where glass particles may contaminate the drawing needle, or when using large-bore needles like 20G that may cause more tissue trauma than necessary). Consult facility policy. If changing needles, carefully remove drawing needle and attach fresh needle of appropriate size for injection route (may use smaller gauge like 22G-25G for IM if medication viscosity permits).
Drawing Medication from Ampules:
- Prepare ampule: Tap top of ampule gently to move all medication from neck into main chamber.
- Clean ampule neck: Wipe neck of ampule with alcohol swab.
- Break ampule: Wrap ampule neck with alcohol swab or gauze for protection. Hold ampule firmly at base. Snap neck away from you with quick, controlled motion. Dispose of ampule top safely.
- Insert needle: Remove needle shield. Insert needle into open ampule without touching needle to glass edges (contamination risk and needle dulling).
- Tilt ampule: Tilt ampule to angle that keeps needle tip submerged in medication as you draw. May need to adjust angle as volume decreases.
- Withdraw medication: Pull plunger back slowly to draw medication. The 20G bore allows efficient withdrawal even of viscous medications. Reposition ampule or needle angle as needed to access all medication.
- Remove air bubbles: Hold syringe upright (needle pointing up). Tap barrel firmly to move bubbles to top. Push plunger slightly to expel air. Redraw to correct volume if needed.
- ALWAYS change needle: Replace the needle used to draw from ampule with a new sterile needle before injection. Glass particles can contaminate the drawing needle and cause tissue injury or granulomas. This step is mandatory for ampule draws.
Intramuscular Injection Technique (Deltoid Site):
Site Selection and Landmarks:
- Locate deltoid muscle: Expose upper arm completely. Locate acromion process (bony prominence at top of shoulder where shoulder meets arm).
- Identify injection zone: Measure 2-3 finger widths (approximately 1-2 inches or 2.5-5 cm) below acromion process. Injection site is in the thickest part of deltoid muscle, forming an inverted triangle below the acromion.
- Palpate muscle: Feel for adequate muscle mass. If muscle feels thin or patient is very lean, consider using shorter needle or alternative site (vastus lateralis).
- Avoid danger zones: Stay away from radial nerve (runs along outer edge of arm) and brachial artery (runs along inner arm).
Preparation and Injection:
- Position patient: Have patient sit or stand with arm relaxed at side, slightly abducted. Ensure good lighting and access to injection site.
- Clean site: Wipe injection site with alcohol swab using firm circular motion, starting at center and moving outward (approximately 2-inch diameter). Allow alcohol to air dry completely (prevents stinging and ensures antiseptic effectiveness).
- Prepare needle: Remove needle cap just before injection. Hold syringe like a dart in dominant hand.
- Stretch skin taut: Use non-dominant hand to stretch skin flat over injection site. For IM injections, skin should be taut, not pinched (pinching is for subcutaneous injections).
- Insert needle: Insert at 90-degree angle (perpendicular to skin) with quick, smooth, dart-like motion. Insert needle fully to the hub (entire 1-inch length should enter muscle). Quick insertion reduces discomfort.
- Aspirate (per facility protocol):
- Traditional practice: Pull back on plunger slightly (5 seconds) to check for blood return
- If blood appears: Withdraw needle, apply pressure, discard syringe-needle assembly, prepare fresh medication with new supplies
- If no blood appears: Proceed with injection
- Current CDC guidelines: Aspiration not necessary for vaccines; check facility policy for other medications
- Inject medication: Push plunger slowly and steadily. Injection speed depends on medication volume and viscosity:
- Thin solutions: 1 mL per 2-3 seconds
- Viscous solutions: 1 mL per 5-10 seconds (slower for thick medications)
- The 20G bore allows reasonable injection speed even for viscous medications
- Withdraw needle: After medication fully injected, wait 1-2 seconds, then withdraw needle quickly at same 90-degree angle it entered.
- Apply pressure: Immediately apply gentle pressure to injection site with clean gauze or cotton ball. Do NOT massage site (can force medication into subcutaneous tissue and affect absorption). Apply adhesive bandage if needed.
Alternative IM Sites (if deltoid inappropriate):
Vastus lateralis (anterior thigh):
- Use for large volume injections, viscous medications, or when deltoid muscle mass insufficient
- Locate middle third of thigh, lateral aspect
- Good alternative for patients with small deltoid muscles
- 1" needle typically adequate for average adults; may need 1.5" for obese patients
Ventrogluteal (hip):
- Safest IM site (fewest blood vessels and nerves)
- Requires specific landmarking technique
- May require longer needle (1.5") depending on patient size
- Less commonly used but preferred by some facilities
Blood Draw Technique:
- Patient preparation: Confirm patient identity. Position patient comfortably (seated or supine). Select appropriate venipuncture site or access port.
- Apply tourniquet (for peripheral venipuncture): Apply 3-4 inches above intended puncture site. Tighten to impede venous flow but not arterial flow. Should be able to palpate pulse distal to tourniquet.
- Select vein: Palpate to identify suitable vein. Choose vein that is straight, well-fixed, and adequate size for 20G needle.
- Clean site: Wipe with alcohol swab in circular motion. Allow to dry completely.
- Anchor vein: Use non-dominant hand to stretch skin taut and anchor vein below intended puncture site.
- Insert needle: Position needle with bevel up, at 15-30 degree angle to skin. Insert smoothly into vein. You should feel slight "pop" as needle enters vein.
- Confirm placement: Look for blood flashback in hub (visible through transparent hub). If no flashback, adjust needle position slightly or withdraw and attempt new site.
- Draw blood: Pull back on plunger slowly and steadily to withdraw required blood volume. Release tourniquet once blood flow established.
- Remove needle: Place gauze over puncture site. Withdraw needle quickly. Apply firm pressure to site for 2-5 minutes (longer if patient on anticoagulants).
- Transfer blood to collection tubes: Follow proper order of draw. Mix tubes gently by inverting (do not shake). Label immediately per facility protocol.
Wound Irrigation and Aspiration:
- Assess wound: Inspect wound size, depth, and contamination level. Determine if irrigation or aspiration indicated.
- Prepare irrigation solution: Use sterile saline or prescribed solution. Draw into syringe through 20G needle.
- Clean wound perimeter: Clean skin around wound with antiseptic.
- For irrigation: Direct stream into wound with adequate pressure to dislodge debris but not damage tissue. The 20G bore provides good pressure and flow for effective irrigation.
- For aspiration: Insert needle into fluid collection (abscess, hematoma, joint space per physician direction). Pull back on plunger to aspirate fluid into syringe.
- Collect specimen if needed: Transfer aspirated fluid to sterile collection container. Label per facility protocol.
Post-Procedure Care:
- Do not recap: Never recap used needles—this is the leading cause of needlestick injuries in healthcare.
- Activate safety device (if applicable): If needle has integrated safety shield, activate immediately after withdrawal from patient per manufacturer instructions.
- Immediate disposal: Dispose of entire needle-syringe assembly immediately into FDA-approved puncture-resistant sharps container. Do not separate needle from syringe before disposal (increases injury risk).
- Remove gloves and perform hand hygiene: Remove gloves using proper technique. Wash hands thoroughly with soap and water or use alcohol-based hand sanitizer.
- Document procedure: Record medication administered (type, dose, route, site, time), procedure performed, patient response, and any complications or unusual findings.
- Monitor patient: Observe for adverse reactions appropriate to medication or procedure. For IM injections, assess injection site after 10-15 minutes for excessive bleeding, swelling, or hematoma formation.
Troubleshooting:
Difficult needle insertion into vial stopper:
- 20G needles penetrate most stoppers easily due to larger diameter
- Ensure you're inserting through center of stopper (thinnest point)
- Use firm, controlled pressure
- If stopper is very tough (some refrigerated medications), allow vial to reach room temperature
- Damaged or dried-out stoppers may be difficult—inspect vial date and storage
Needle bends during insertion:
- 20G needles are relatively rigid but can bend if hitting bone
- For IM injections, ensure adequate muscle mass at selected site
- Insert at correct 90-degree angle (angled insertion may cause bending)
- Don't force needle against resistance—withdraw and reassess
- Replace with new needle if bent (never use bent needles)
Medication won't flow through needle:
- 20G should handle even viscous medications well
- Ensure needle isn't clogged (can occur with suspensions or particulates)
- Verify needle tip is fully submerged in medication (when drawing from vial)
- Check that plunger moves freely in syringe barrel
- For very thick medications: Warm to room temperature if refrigerated (check if allowed per medication guidelines)
- Ensure vial has adequate air pressure (inject more air if needed)
Excessive pain during IM injection:
- Ensure alcohol has dried completely before insertion
- Insert quickly with dart-like motion (reduces discomfort)
- Inject slowly and steadily (rapid injection of large volumes causes pain)
- Verify you're in muscle, not subcutaneous tissue
- Consider smaller gauge needle if medication viscosity permits (22G-23G)
- Rotate sites if repeated injections needed
Blood flashback during IM injection (when aspirating):
- If blood appears in syringe, withdraw needle immediately
- Apply pressure to site
- Discard medication and syringe-needle assembly
- Prepare fresh medication with new supplies
- Select different injection site
- Note: Some medications can still be given even with small blood flashback—consult pharmacist or physician if uncertain
Difficulty obtaining blood flashback during venipuncture:
- Adjust needle depth slightly (may be through vein or not deep enough)
- Rotate needle slightly to ensure bevel is in vein lumen
- Release tourniquet briefly and reapply (vein may have collapsed)
- Palpate vein again to verify position
- If unable to obtain blood after repositioning, withdraw and attempt new site
- 20G may be too large for small, fragile veins—consider smaller gauge
Needle detaches from syringe during use:
- Ensure needle was fully seated before starting procedure
- For Luer Lock: Verify needle was twisted until resistance felt
- For Luer Slip: Verify needle hub was pushed fully onto syringe tip
- Check that syringe tip type matches needle hub type
- 20G needles used for higher-pressure applications—connection must be very secure
- Replace both needle and syringe if connection appears damaged
Hematoma formation after IM injection:
- More common with larger gauge needles like 20G
- Apply firm pressure immediately after needle withdrawal
- Use smallest appropriate gauge for medication
- Patients on anticoagulants are higher risk
- Document and monitor size; report if expanding or patient develops pain
- Ice application may reduce hematoma size (check facility protocol)
Special Considerations:
Viscous medications:
- 20G is specifically chosen for thick solutions (oil-based hormones, some antibiotics, depot formulations)
- Warm medication to room temperature if permitted (increases flow)
- Draw medication slowly to prevent air bubble formation
- Inject slowly to reduce tissue damage and patient discomfort
- Consider massaging site after injection for some medications (check specific medication guidelines)
Pediatric patients:
- 20G × 1" typically too large for most pediatric patients
- May be appropriate for adolescents with adequate muscle mass
- For children, use smaller gauge (22G-25G) and shorter length based on age and size
- Deltoid muscle not well-developed in young children—use vastus lateralis instead
- Distraction techniques critical for reducing anxiety and movement
Geriatric patients:
- May have decreased muscle mass—assess deltoid carefully
- Skin may be thinner and more fragile
- May bruise more easily due to age-related changes or medications
- Slower injection may reduce discomfort
- Provide clear instructions and ensure patient understanding
- May need assistance with positioning
Obese patients:
- 1" needle may be inadequate for reaching deltoid muscle in very obese patients
- Consider 1.5" needle if subcutaneous tissue layer is thick (>1 inch)
- Vastus lateralis or ventrogluteal sites may be more reliable
- Ensure needle length adequate to reach muscle tissue
Cachectic/very lean patients:
- Assess muscle mass carefully—may have inadequate deltoid muscle
- Consider shorter needle (5/8") or smaller gauge to reduce trauma
- Vastus lateralis may have more muscle mass than deltoid
- Use smallest appropriate gauge for medication viscosity
Patients with bleeding disorders or on anticoagulants:
- Apply pressure longer after injection or venipuncture (5-10 minutes)
- Avoid massage of injection site
- Monitor closely for hematoma formation
- Consider smaller gauge needle if medication permits (reduces tissue trauma)
- Document anticoagulation status in medical record
Patients with needle anxiety:
- Provide clear explanation of procedure
- Use distraction techniques
- Quick needle insertion reduces discomfort
- Topical anesthetic may be appropriate for some procedures
- Consider smallest appropriate gauge
- Allow patient to look away during needle insertion if preferred
Immunocompromised patients:
- Strict aseptic technique is critical
- Monitor injection sites closely for infection signs
- Educate patient on infection symptoms to report
- Ensure proper hand hygiene before and after procedure
- Some immunocompromised patients avoid IM route due to infection risk
Medication-Specific Considerations:
Oil-based medications (testosterone, progesterone):
- Warm to room temperature before administration (increases flow)
- Use 20G or larger gauge due to high viscosity
- Z-track technique recommended to prevent medication leakage
- Inject slowly (medication is thick)
- Do not massage injection site (can force medication into subcutaneous tissue)
Antibiotics (penicillin, ceftriaxone):
- Some antibiotics are very painful on injection—inject slowly
- Divide large volumes (>3 mL) into two injection sites
- Rotate sites for repeated doses
- Monitor for injection site reactions (redness, swelling, induration)
Depot antipsychotics (haloperidol decanoate, fluphenazine):
- Very viscous—20G or 21G typically required
- Z-track technique recommended
- Inject into large muscle (ventrogluteal preferred)
- Slow injection reduces discomfort
- Document injection site for rotation with subsequent doses
Immunoglobulins:
- Viscous solution requiring larger bore needle
- May cause significant injection site pain
- Inject slowly
- Divide large volumes across multiple sites
- Monitor for systemic reactions post-injection
Blood specimens:
- Order of draw important when collecting multiple tubes
- Use appropriate vacuum tubes for 20G needle
- Ensure adequate blood flow to prevent hemolysis
- Invert tubes gently (don't shake)
- Label immediately per facility protocol
Storage and Handling:
- Store in cool, dry location protected from direct sunlight and moisture
- Maintain temperature between 15-30°C (59-86°F)
- Keep in original packaging until use to maintain sterility
- Protect from physical damage (crushing, puncturing)
- Do not use needles stored in extreme temperatures (heat or freezing)
- Inspect packages before use—discard if damaged, wet, or expired
- Do not use past expiration date (sterility cannot be guaranteed)
- Rotate stock using FIFO (first in, first out) method
Disposal Requirements:
- Dispose of needle-syringe assembly immediately into FDA-cleared sharps container
- NEVER recap used needles using two-hand technique (use one-hand scoop method ONLY if absolutely necessary)
- Never separate needle from syringe before disposal
- Do not place used needles in regular trash, recycling bins, or biohazard bags (needles require puncture-resistant sharps containers)
- Do not overfill sharps containers—seal when 3/4 full
- Follow facility protocols for sharps container disposal
- For home use: Use FDA-cleared sharps container; when full, seal and dispose per local regulations (many pharmacies, hospitals, and health departments offer disposal programs)
Infection Control:
- Always use aseptic technique for all procedures
- Never reuse needles—single-use only
- Never use same needle for multiple patients
- Discard needles from damaged or opened packages
- Clean injection sites with alcohol before each procedure
- Discard any needle that touches non-sterile surface
- Use new sterile needle for each medication draw and injection
- Follow facility protocols for multidose vial access
Safety Considerations:
Needlestick injury prevention:
- Never recap needles using two hands (leading cause of needlestick injuries)
- If recapping absolutely necessary, use one-handed scoop technique only
- Dispose of sharps immediately—never set down used needles
- Don't pass used needles hand-to-hand between staff
- Use safety-engineered devices when available
- Report all needlestick injuries immediately per facility protocol
Blood-borne pathogen exposure:
- If needlestick occurs, immediately wash with soap and water
- Report to occupational health or emergency department immediately
- Source patient blood testing may be needed (HIV, hepatitis B, hepatitis C)
- Post-exposure prophylaxis may be required depending on exposure risk
- Complete incident report per facility protocol
- Follow up with employee health as directed
When to Contact Healthcare Provider or Supervisor:
- Uncertainty about appropriate needle size for specific medication
- Questions about injection technique for unfamiliar medications
- Difficulty performing procedure (unable to aspirate blood, cannot access vein)
- Needlestick injury or potential blood-borne pathogen exposure
- Patient develops complications after injection (severe pain, swelling, infection signs)
- Adverse medication reactions
- Equipment malfunction or quality concerns
Regulatory Compliance:
- Medline needles manufactured to meet FDA requirements for hypodermic needles
- Produced in FDA-registered and ISO-certified facilities
- Comply with ISO 7864 (sterile hypodermic needles for single use)
- Meet ISO 9626 standards for stainless steel needle tubing
- Color coding typically follows ISO 6009 international standards (yellow for 20G)
- Latex-free to comply with healthcare worker and patient safety requirements
- Meet ASTM standards for medical device sterility
Technical Specifications
Product Details:
- Manufacturer: Medline Industries, Inc.
- Product Type: Standard hypodermic needle
- Needle Gauge: 20G (0.9mm outer diameter)
- Needle Length: 1 inch (25mm)
- Bevel Type: Regular bevel for general-purpose use
- Wall Type: Regular wall (standard inner/outer diameter ratio)
- Cannula Material: Surgical-grade stainless steel
- Hub Color: Typically yellow (per ISO 6009 color coding standard for 20G)
- Hub Material: Medical-grade polypropylene or polycarbonate
- Hub Type: Transparent or translucent for flashback visualization
- Connection Type: Universal hub compatible with both Luer Lock (threaded) and Luer Slip (push-on) syringes
- Sterility: Sterile, individually packaged
- Sterilization Method: Ethylene oxide (EtO) or gamma radiation
- Latex Content: Latex-free (no natural rubber latex in needle or packaging)
- DEHP-Free: Typically yes (verify with specific product documentation)
- Needle Shield: Rigid protective shield for sterility maintenance and safety
- Expiration: Typically 5 years from manufacture date (check individual packages)
- Packaging: Box of 100 individually wrapped sterile needles
- Intended Use: Medication administration (especially viscous medications), blood draws, fluid aspiration, specimen collection
- Route: Intramuscular, intravenous access, aspiration procedures
- Patient Population: Primarily adults; adolescents with adequate muscle mass
- Regulatory Status: FDA-cleared medical device, Class II
- Standards Compliance: ISO 7864 (sterile hypodermic single-use needles), ISO 9626 (stainless steel needle tubing), ISO 6009 (color coding)
- Country of Origin: Varies by lot (check package labeling)

 780 409-1509
 Get directions